How Can We Help?
How to install the LegalUp Add-In in Word for Mac:
1. Download the Add-In XML file.
2. If a wef folder exists on your computer, place the XML file there. If it doesn’t exist, create it with the following steps:
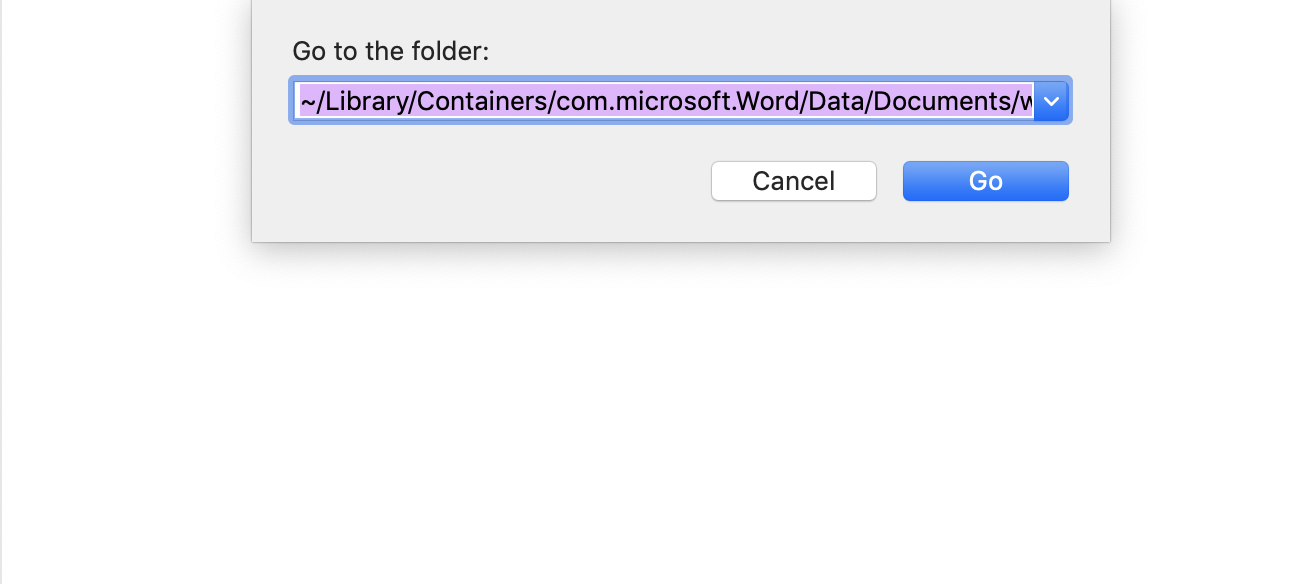
- Click ‘go to folder’ in Finder (Command + Shift + ‘G’ keys) and copy the following directory into the address box: ~/Library/Containers/com.microsoft.Word/Data/Documents/wef. Then click ‘Go’. Place the XML file in that folder.
- Alternative Option: If that doesn’t work, open Finder, create a new folder and rename it: ~/Users/<YOURUSERNAME>/Library/Containers/com.microsoft.Word/Data/Documents/wef
- Place LegalUp’s manifest XML file in the new folder you’ve created by copying and pasting the file from your ‘Downloads’ folder into the new folder.

3. Now make sure that you do not have any Word documents opened, or close any open documents.
4. Open a new Word document.
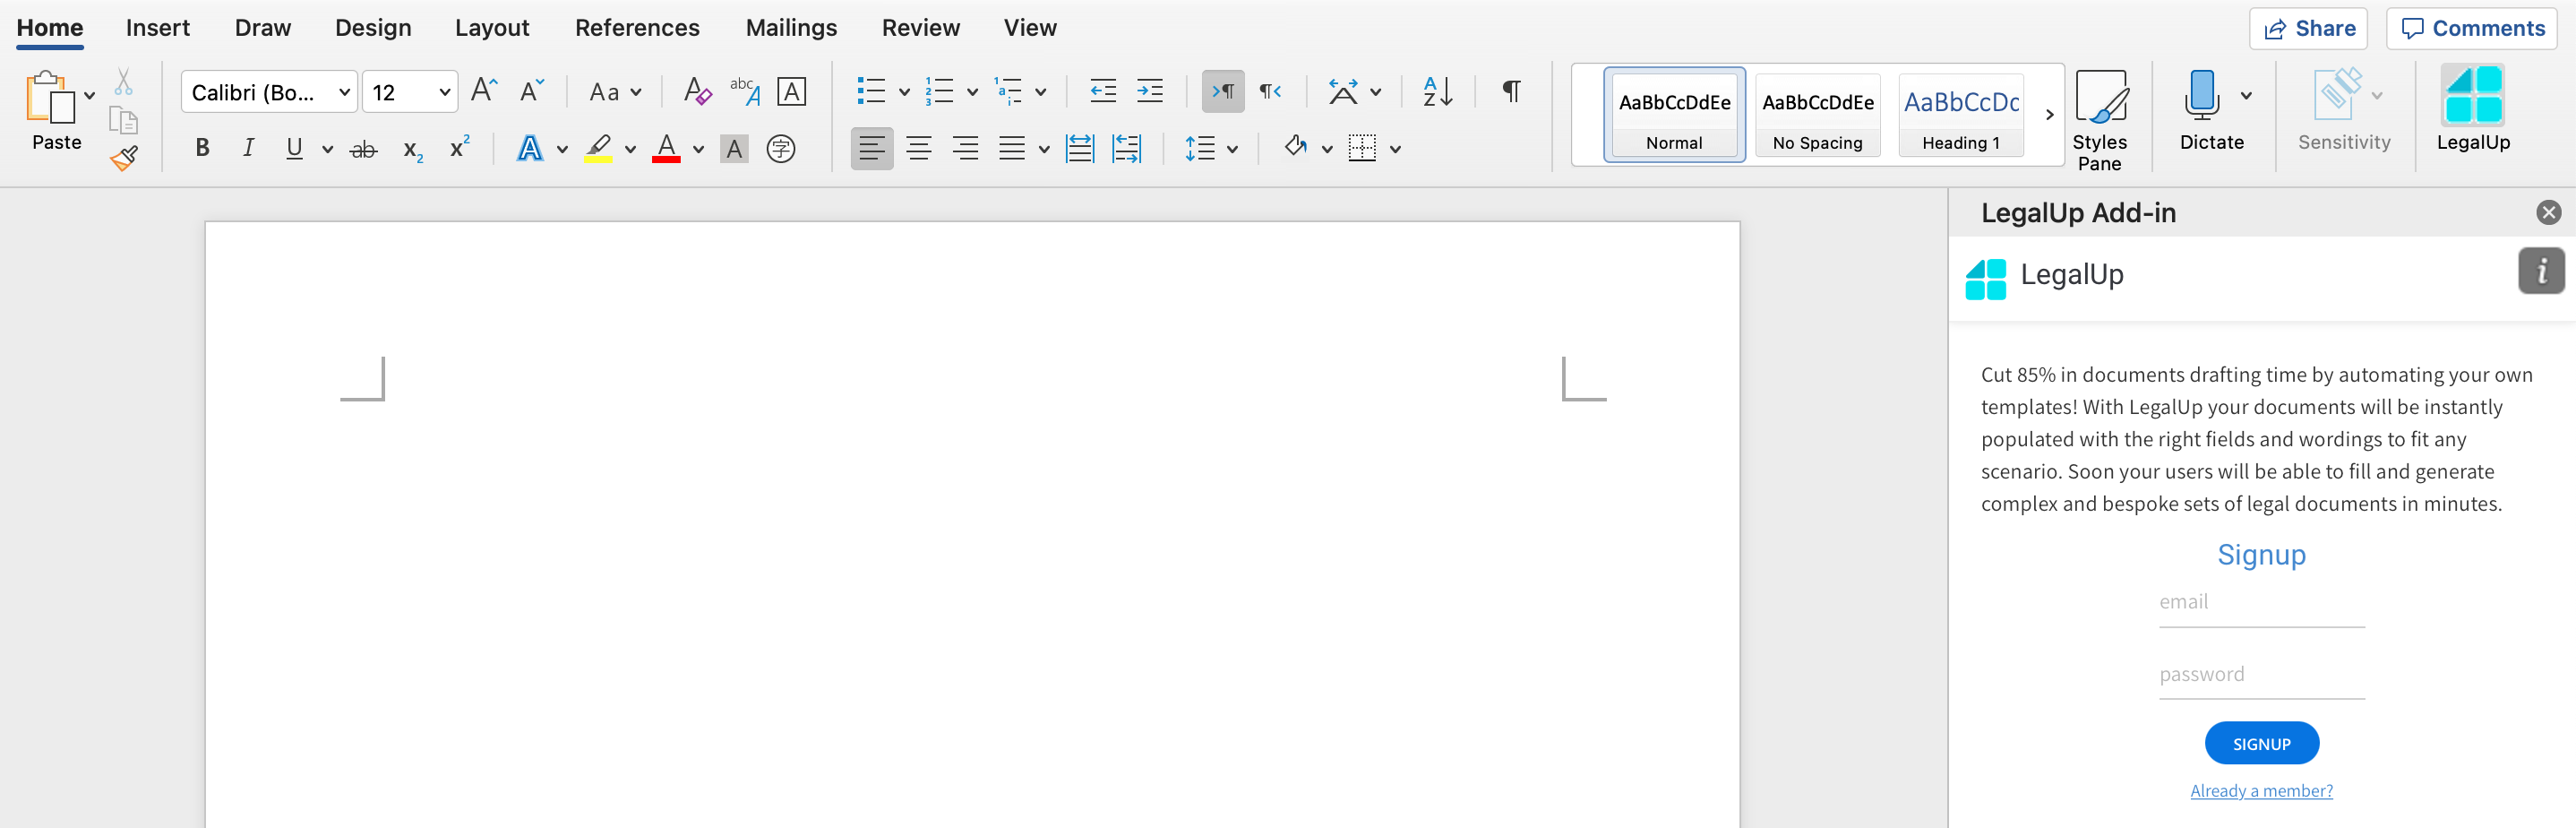
5. Go to the Insert tab–> my Add-ins–> click the drop down arrow and you should see the LegalUp Add-in icon.
 6. Click on the LegalUp Add-in icon to open the Add-in and register.
How to install the LegalUp Add-In in Word for Microsoft:
1. Download the Add-in XML file (The manifest file format must be xml and not html).
2. Create a new folder under “this PC” and name it ‘manifest’ (or any other name). Please note: the folder in which the file is saved should be saved on the computer (desktop, downloads, or documents) and not on a cloud location (such as SharePoint or a similar location).
3. Place the Add-in XML file in the new folder.
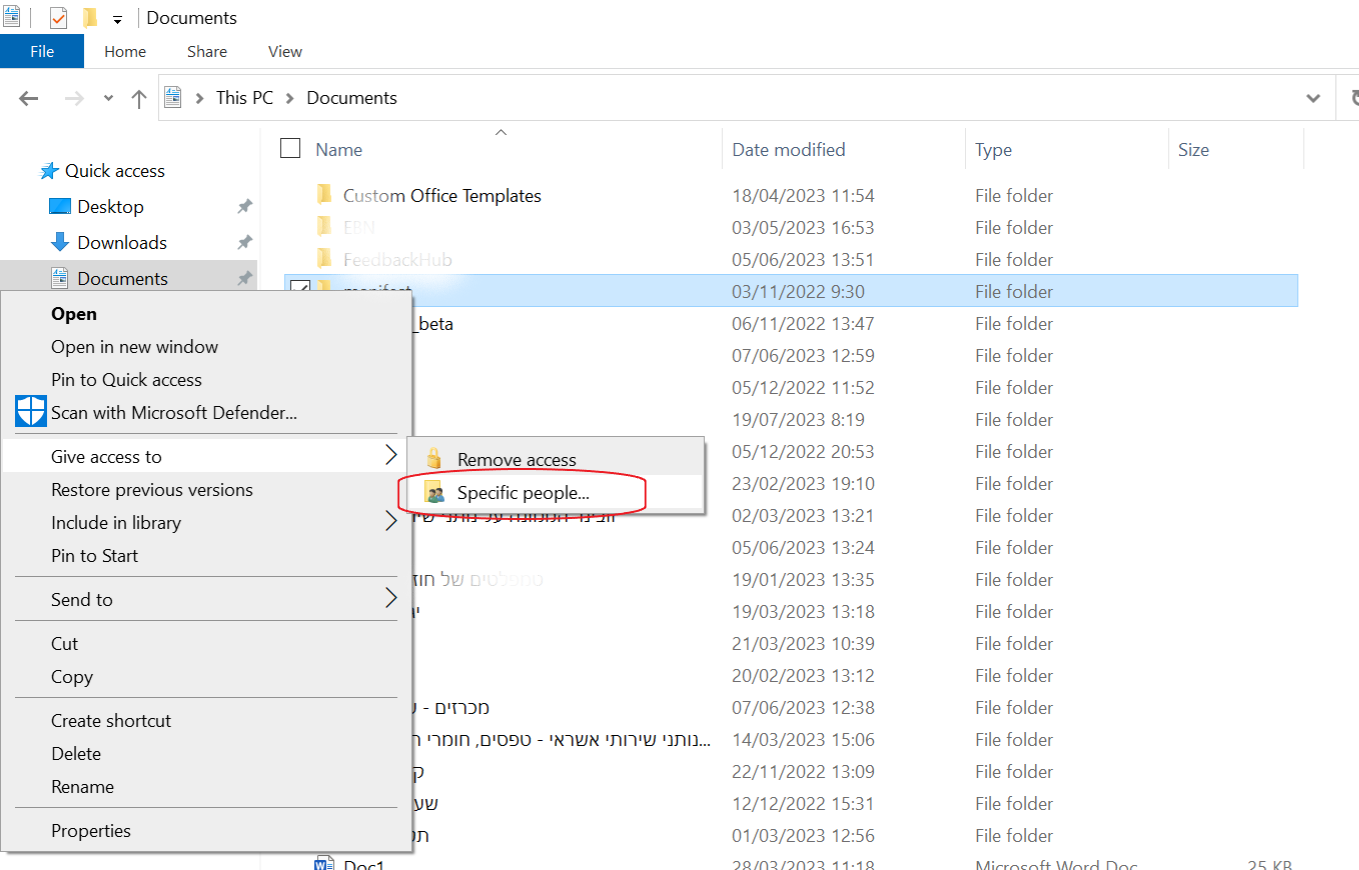
 4. Tap on the Folder (not on the XML file itself) —> right click on the mouse —> Give access to “specific people”.
 5. Find yourself in the list (if you didn’t give a name to your computer user, you’ll be simply called “user” like in the screenshot below). Click “add” and then click “share”.

Please note: to give access to a specific user for a folder on Windows 11, you can follow these steps:
- Right-click on the folder you want to modify the access permissions for and select “Properties” from the context menu.
- In the Properties window, navigate to the “Security” tab.
- Click on the “Edit” button to modify the access permissions for the folder.
- In the “Permissions for [Folder Name]” window, click on the “Add” button.
- In the “Select Users or Groups” window, type the username of the specific user you want to give access to and click “Check Names” to validate the username. Alternatively, you can click on the “Advanced” button and use the “Find Now” button to browse and select the user from a list.
- Once the username is verified, click on the “OK” button to close the “Select Users or Groups” window.
- Back in the “Permissions for [Folder Name]” window, you will see the added user listed. Select the user and check the permissions you want to grant them under the “Allow” column. For example, you can allow “Full Control,” “Read,” or “Write” permissions.
- Click on the “Apply” button to save the changes.
- In the confirmation dialog, click on the “OK” button.
- Finally, click on the “OK” button in the “Permissions for [Folder Name]” window to close it.
6. The following screen will open up.
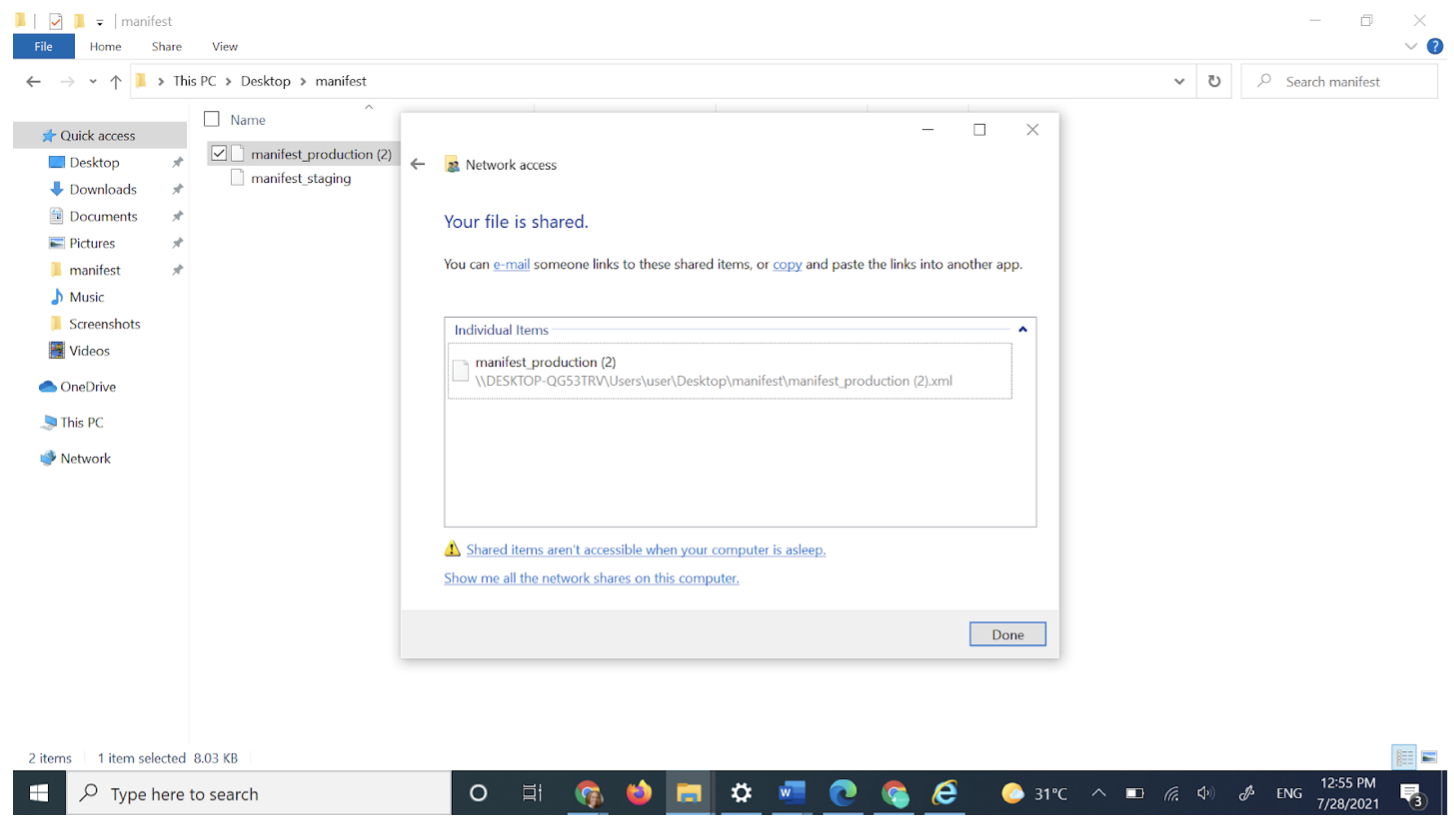
7. Tap on the address line below the file name and copy it: right click –> copy link. Please note that the shared address should be of the folder and not of the file.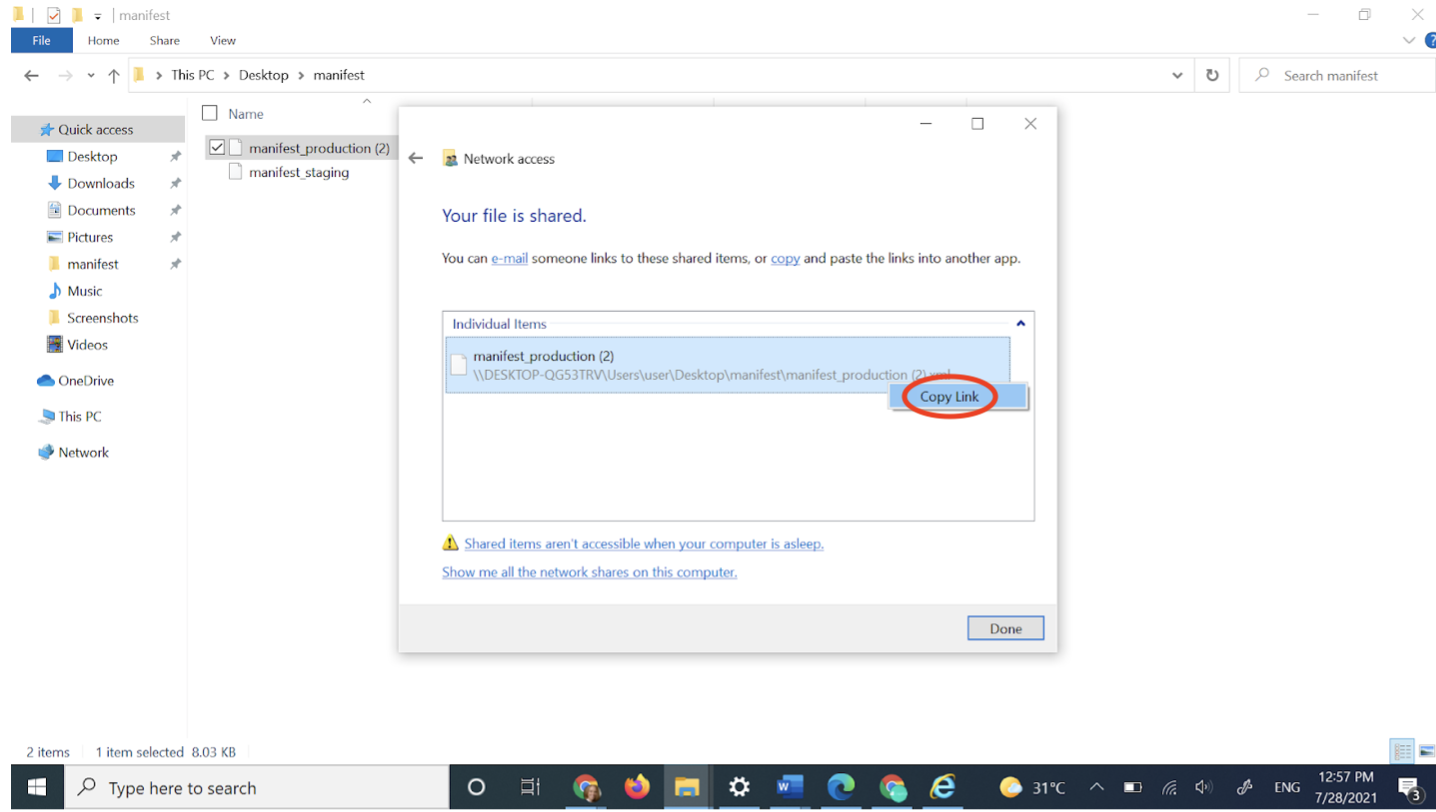
8. Now open up a new Word file. Go to “file” –> “options”.

9. The following screen will open up. Select “trust center”.
 10. Select the “trusted Add in catalogs” tab.
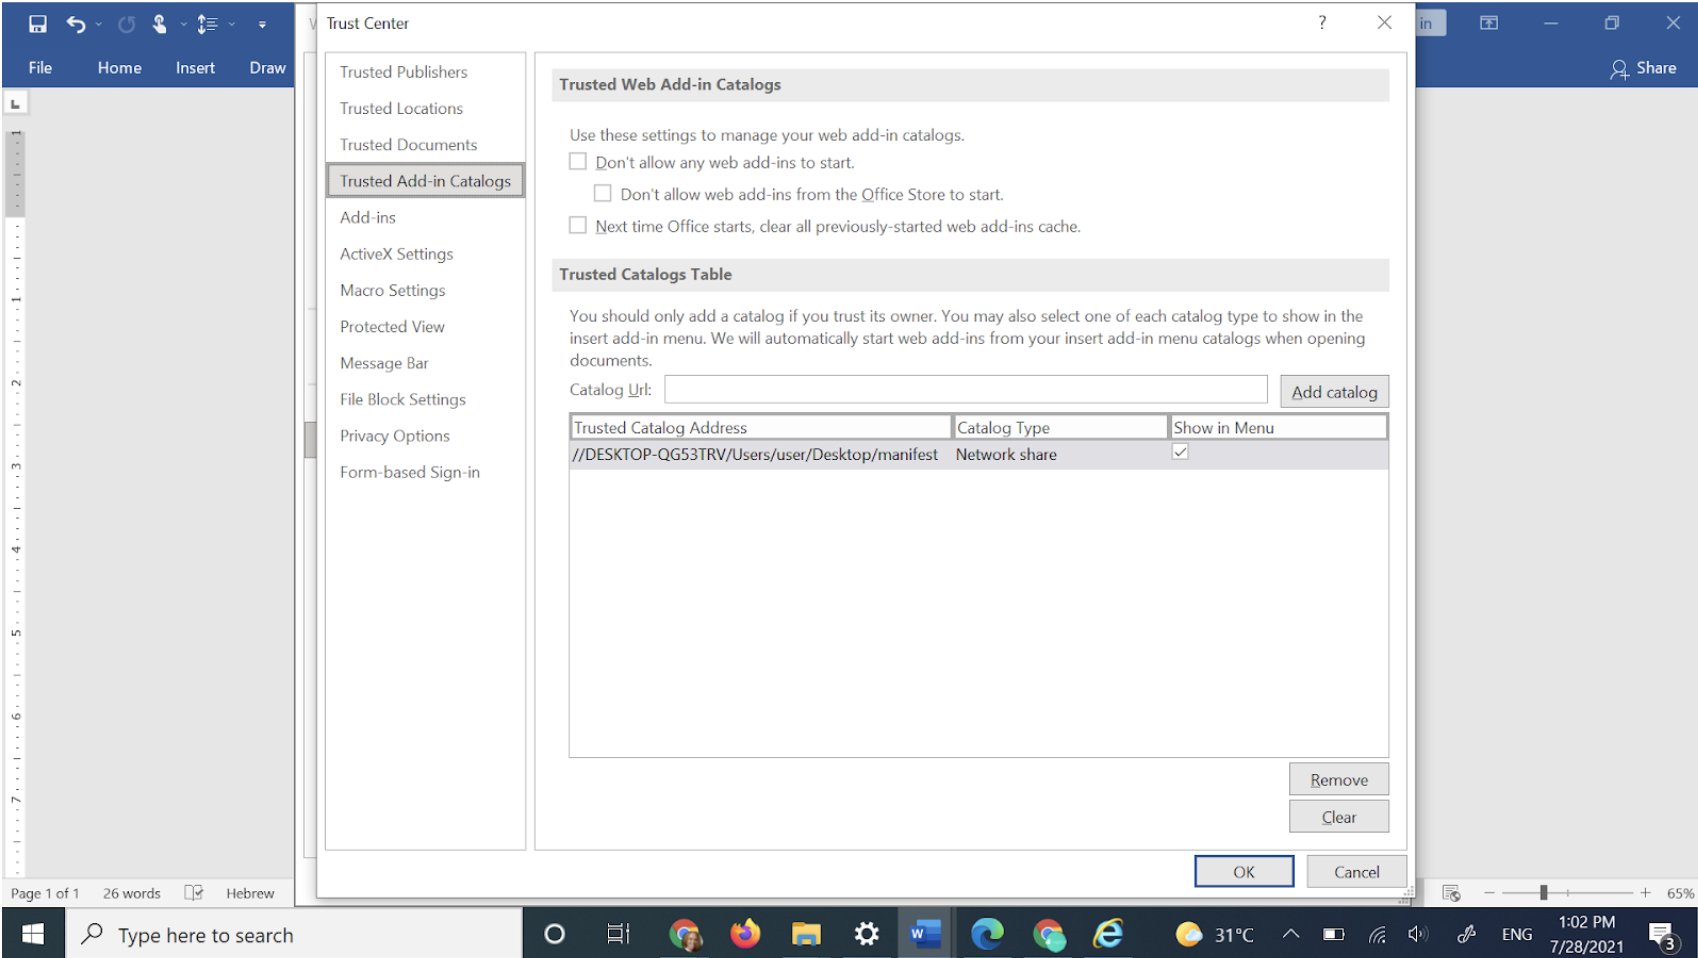
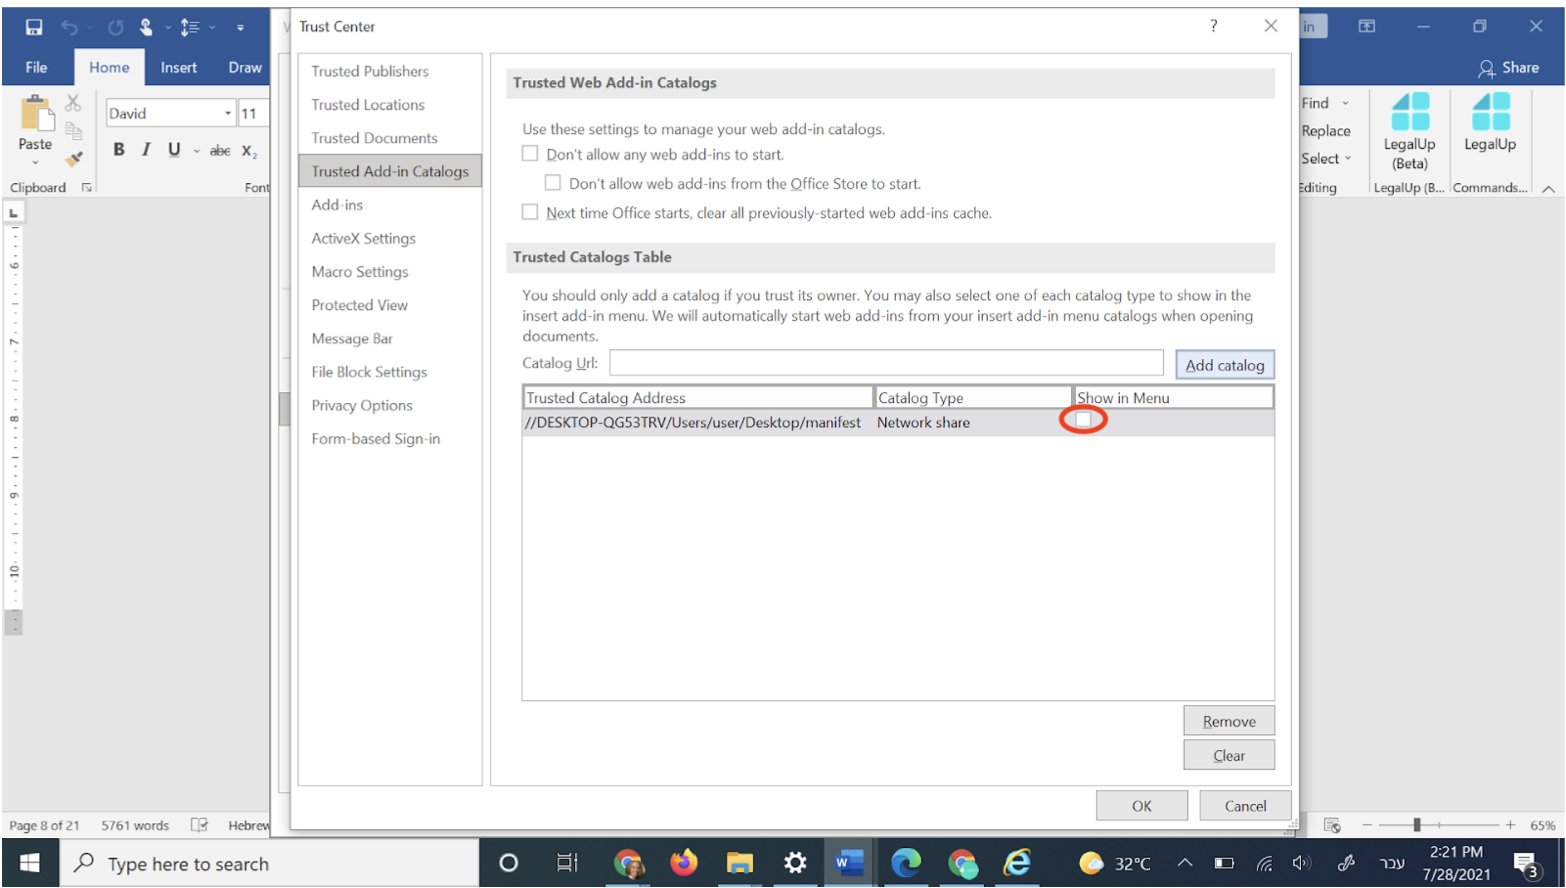
11. In the catalog url row paste the folder name you copied. In our example the link of the whole file has been copied and we need to put here only the link to the folder. So we deleted all the letters after the folder name (see the highlighted words in the screenshot below – they should be deleted).
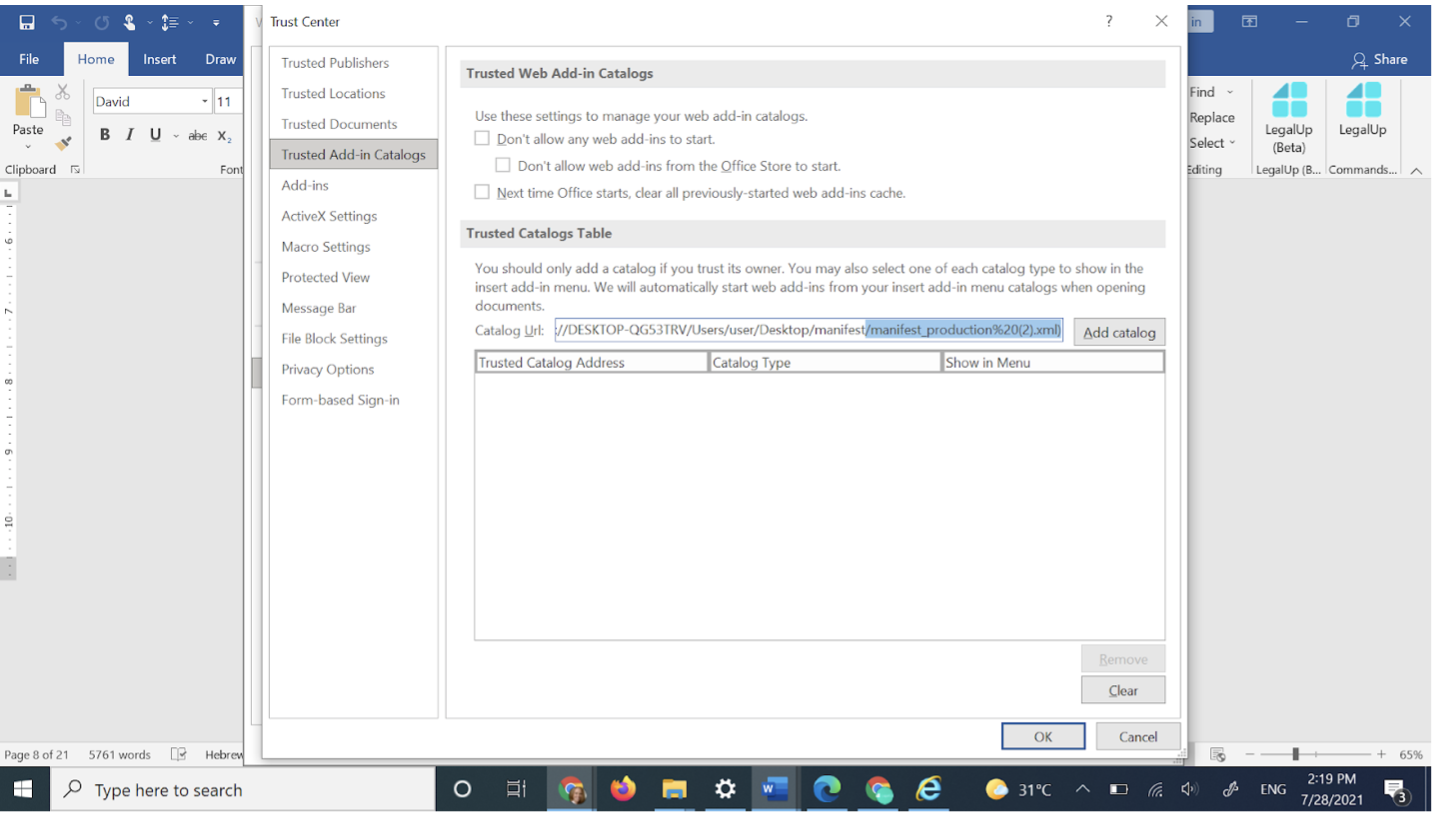 Also, if you have any letters or signs at the beginning of the link, before the “//” – as in the screenshot below – they should be deleted too
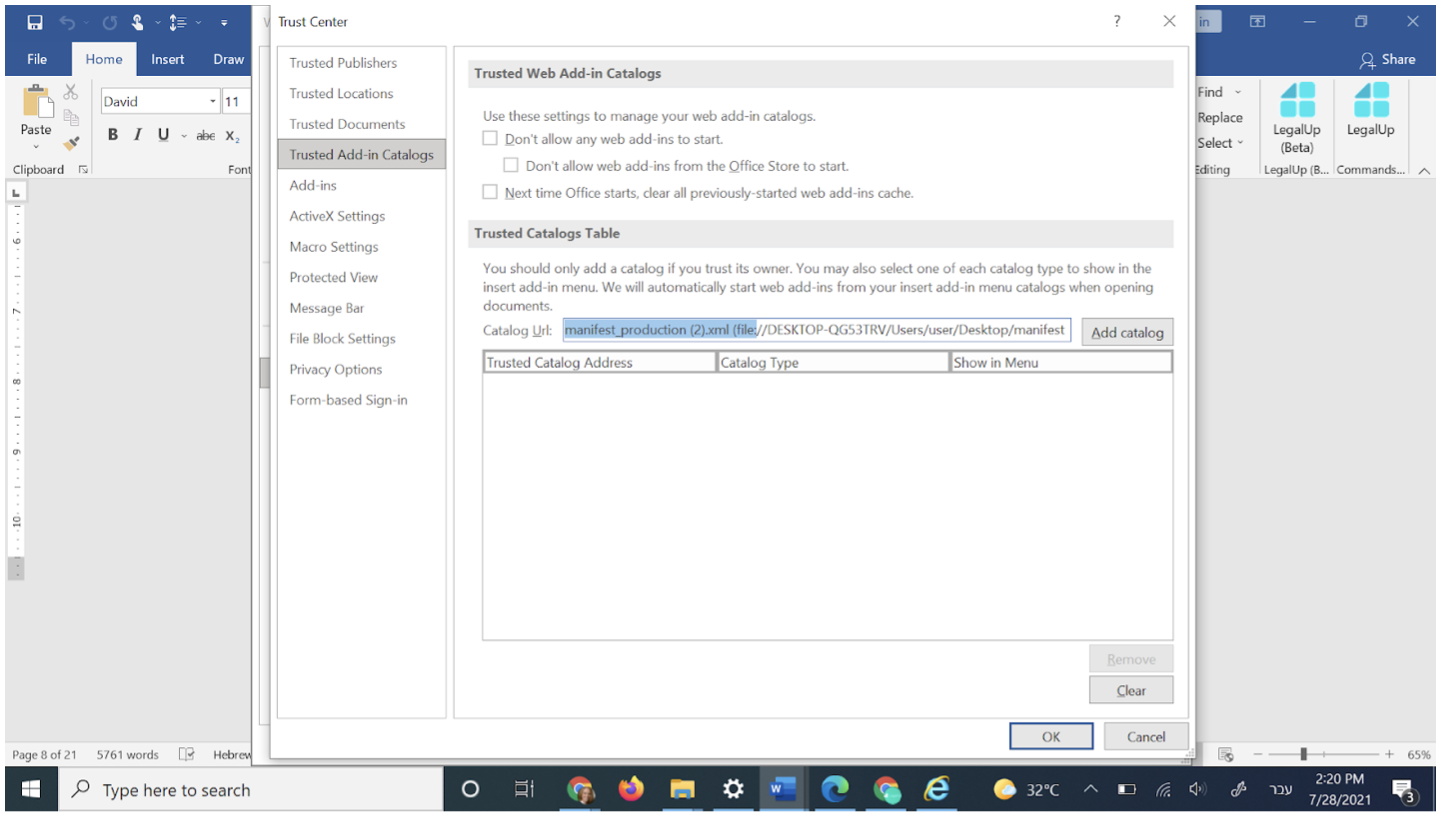 12. Then check the box under “show in menu”
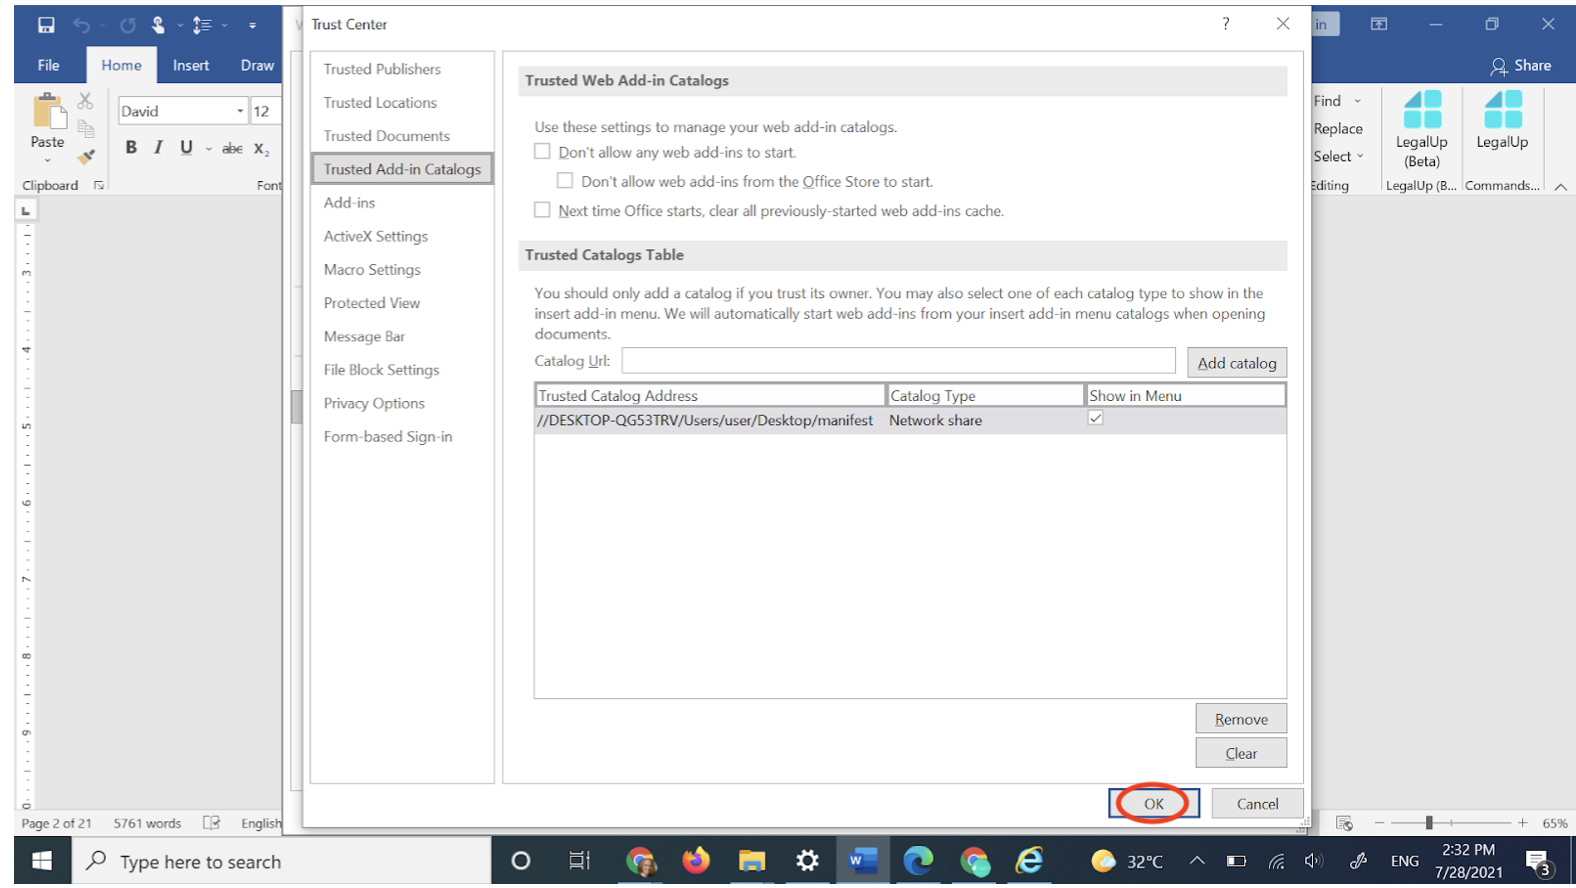
 13. Click ok and restart Word
 14. Open a new Word file. Select: insert –> My Add-ins –> See All
15. The following screen will open up. select “shared folder” and the LegalUp add-in should appear there. Click Add.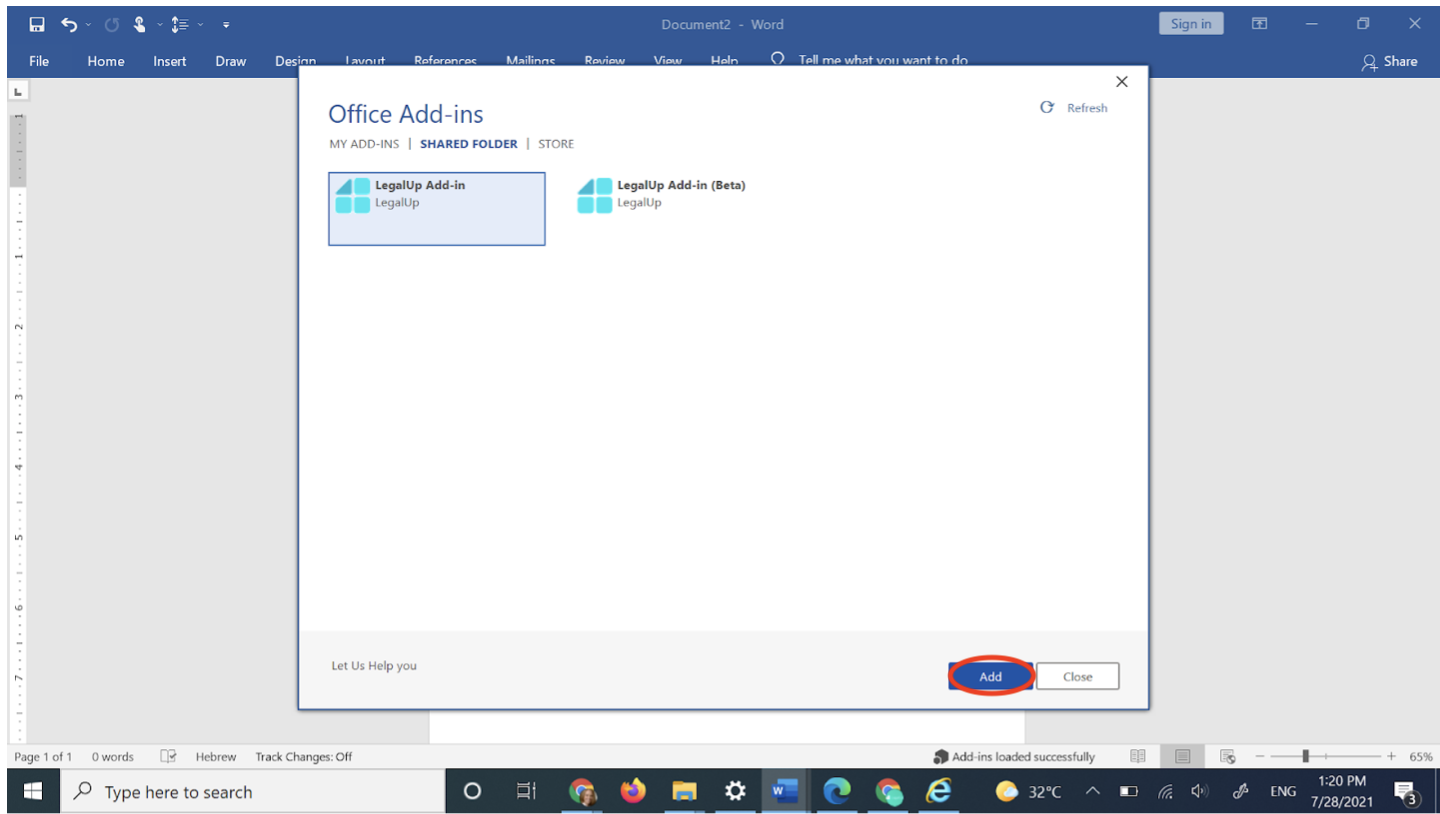
16. Click on LegalUp Add-in Icon (it should appear in the ‘home’ tab) to open the Add-in and Log in / Sign up.